
Cuisinart Ice Cream Machine Instructions: A Comprehensive Guide
Navigating homemade ice cream with your Cuisinart machine requires understanding coolant functionality, proper freezing, and base chilling for optimal results—avoiding liquid outcomes!
Understanding Your Cuisinart Ice Cream Maker
Your Cuisinart ice cream maker simplifies a traditionally labor-intensive process, delivering delicious frozen treats with ease. However, success hinges on understanding its core mechanics. The machine relies on a double-walled freezing bowl containing a coolant.
This coolant must be fully frozen – not just cold – before use. A compromised coolant, losing its freezing capacity, results in a liquid base. Pre-chilling the ice cream base and even the machine itself further enhances freezing speed and texture, minimizing ice crystal formation for a superior final product.
Components and Their Functions
The Cuisinart ice cream maker comprises several key components working in harmony. The freezing bowl, containing the coolant, is central to the process, absorbing heat from the mixture. The paddle, driven by a motor, continuously churns the base, preventing large ice crystal formation.
The motor housing encases the motor and provides the power. Finally, the lid secures the bowl and allows ingredient addition. Ensuring each component is correctly assembled and functioning is vital for successful ice cream creation.
Preparing the Freezing Bowl
Proper freezing of the bowl is paramount for successful ice cream making. Ensure the bowl is thoroughly frozen for at least 24 hours, ideally in the coldest part of your freezer. A key indicator of readiness is the absence of sloshing when the coolant is agitated – it should be solid.
Insufficient freezing results in a liquid base. Pre-freezing is non-negotiable; the coolant must be fully frozen to effectively absorb heat from the ice cream mixture during churning.
Ensuring Proper Freezing: The Key to Success
Achieving a solid freeze within the bowl is critical; the coolant’s temperature must be below your freezer’s temperature. A sloshing sound indicates the coolant hasn’t fully frozen, hindering heat absorption. Consistent, deep freezing is essential for transforming the liquid base into creamy ice cream.
Prioritize a dedicated freezer space, avoiding frequent door openings. A fully frozen bowl guarantees efficient churning and prevents a disappointing, liquid result. Patience is key!
Troubleshooting: When the Bowl Won’t Freeze
If your bowl fails to freeze, suspect a compromised coolant. A sloshing sound when warm confirms the coolant isn’t solidifying. The freezing point may have dropped below freezer temperature, rendering it ineffective. Don’t continue churning with a non-frozen bowl—it won’t work!
An advanced solution involves carefully draining and replacing the coolant with a 70% water/30% propylene glycol mixture, restoring its freezing capabilities. This requires drilling and resealing.
Preparing the Ice Cream Base
A well-prepared base is crucial for superior ice cream. Pre-chilling the base significantly improves the final texture, promoting faster freezing and minimizing ice crystal formation. While not strictly necessary, chilling yields a smoother, creamier result.
Consider base consistency; it should be adequately chilled before churning. Some users even pre-chill the machine itself for even quicker initial freezing, maximizing the machine’s efficiency.
The Importance of Chilling the Base
Thoroughly chilling your ice cream base before churning is paramount for achieving optimal texture. This process drastically reduces the formation of large, undesirable ice crystals, resulting in a smoother, more luxurious final product. A chilled base also freezes considerably faster within the Cuisinart machine.
Pre-chilling ensures the mixture doesn’t warm the freezing bowl prematurely, maintaining the necessary low temperature throughout the churning process for consistent results.
Recipe Considerations & Base Consistency
When selecting a recipe, prioritize those specifically designed for ice cream makers, as sugar content and fat levels significantly impact freezing. A properly balanced base will churn efficiently and yield a creamy texture. Avoid overly watery mixtures.
The ideal base consistency should be pourable but not thin; it should coat the back of a spoon; Adjust liquid quantities if needed to achieve this, ensuring a successful churn.
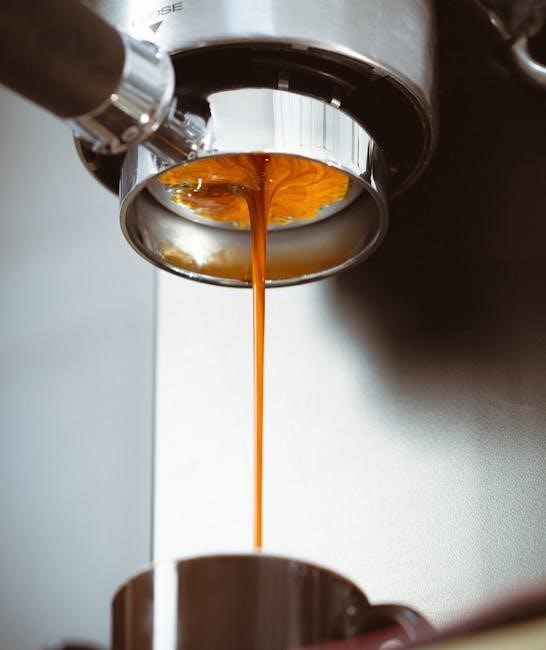
Operating the Ice Cream Machine
Before starting, ensure the thoroughly frozen bowl is securely locked into place. Attach the dasher assembly, aligning the paddle with the motor shaft. Gently pour the chilled ice cream base into the bowl, avoiding overfilling—leave ample space for expansion during churning.

Power on the machine and allow it to operate until the mixture reaches your desired consistency, typically 20-30 minutes.
Assembling the Machine Correctly
Proper assembly is crucial for efficient operation. Begin by firmly securing the freezing bowl onto the Cuisinart base, ensuring it clicks into place. Next, carefully attach the dasher assembly—the paddle—to the motor shaft, verifying a snug fit.
The paddle must rotate freely without wobbling. Incorrect assembly can lead to uneven churning or motor strain, impacting the final ice cream texture.
Churning Process: Duration and Monitoring
The churning duration typically ranges from 20 to 30 minutes, but constant monitoring is key. Initially, the mixture will be liquid, gradually thickening as it freezes. Continue churning until the mixture reaches a soft-serve consistency, sticking to the dasher.
Avoid over-churning, as this can strain the motor. If it becomes too solid to churn, it’s ready for post-churning freezing!
Achieving the Perfect Consistency
The Cuisinart machine initially produces a soft-serve texture. For a firmer consistency, transfer the freshly churned ice cream to an airtight container and freeze for an additional one to six hours. A quick serve directly from the machine is possible, but requires speed!
Pre-chilling the base enhances texture, minimizing ice crystals and accelerating freezing.
Soft Serve vs. Firm Ice Cream
The Cuisinart typically yields a soft-serve consistency upon completion of the churning cycle. This is because the mixture reaches a frozen state, but isn’t fully hardened. For those preferring a firmer texture, a post-churning freeze is essential.
Allowing the ice cream to harden in the freezer for a couple of hours will create a more scoopable product, while six hours results in a solid block.
Post-Churning Freezing for Desired Texture

After churning, the ice cream’s texture is akin to soft serve—delicious immediately, but often too soft for traditional scooping. Transferring it to an airtight container and freezing for an additional hour or two firms it up nicely.
For a truly solid consistency, allowing six hours of freezer time is recommended. This step is crucial for achieving the desired texture and preventing rapid melting.
Cleaning and Maintenance
Thorough cleaning is vital for maintaining your Cuisinart ice cream maker’s performance and longevity. Disassemble all removable parts – the bowl, dasher, and lid – after each use. Wash these components with warm, soapy water, ensuring all ice cream residue is removed.
Proper storage is equally important; Ensure all parts are completely dry before reassembling and storing in a cool, dry place to prevent mildew or damage.
Disassembling for Thorough Cleaning
Begin by unplugging the machine! Carefully remove the bowl, dasher (paddle), and lid. The dasher typically pulls straight up and out. Inspect the bowl for any remaining ice cream; a plastic spatula is helpful. The lid usually detaches with a simple lift.
Ensure you check for any small parts or seals that may need separate cleaning. A complete disassembly allows for a more hygienic and effective cleaning process, preventing residue buildup.
Proper Storage to Extend Machine Life
After thorough cleaning and drying, store all components in a cool, dry place. Avoid stacking heavy items on top of the freezing bowl, as this could potentially damage the internal coolant system.
Consider storing the dasher inside the bowl to keep it readily available for the next use. Proper storage prevents corrosion and ensures longevity, preserving your machine’s performance for years of delightful ice cream making!
Troubleshooting Common Issues
If the machine won’t turn on, check the power cord and outlet. A common problem is a non-freezing bowl; if the coolant sloshes when warm, it’s likely failed. For liquid ice cream despite churning, ensure the bowl is fully frozen and the base is adequately chilled.
Consider a coolant replacement if issues persist, using a 70% water/30% propylene glycol mixture for optimal freezing temperatures.
Machine Not Turning On
Before assuming a major malfunction, meticulously check the power cord’s connection to both the machine and a functioning electrical outlet. Ensure the outlet is receiving power by testing it with another device. Verify the machine’s on/off switch is fully engaged.
Inspect the cord for any visible damage, like fraying or cuts, which could prevent power flow. A faulty cord requires replacement.
Ice Cream Remains Liquid After Churning
A common issue is an insufficiently frozen freezing bowl; the coolant may have lost its freezing capacity. Test by listening for sloshing – a frozen bowl will be solid. If it sloshes, the coolant is likely compromised and needs replacing with a 70% water/30% propylene glycol mixture.
Ensure the base was thoroughly chilled before churning, as this significantly impacts freezing speed and final texture.
Advanced Techniques & Recipes
Beyond basic vanilla, explore diverse flavors and mix-ins! Consider adding fruit purees, chocolate chunks, or nuts during the final churn minutes. Don’t limit yourself to ice cream; your Cuisinart excels at sorbet and frozen yogurt – adjust recipes accordingly for sugar content.
Pre-chilling the machine for ten minutes before adding the base can accelerate freezing and improve texture.
Experimenting with Flavors and Mix-Ins
Unleash your creativity! Introduce fruit purees, melted chocolate, or chopped nuts during the last few minutes of churning for even distribution. Consider extracts like vanilla or almond for subtle flavor enhancements. Remember, mix-ins should be relatively small to avoid overworking the machine.
Don’t be afraid to try bolder combinations – blackberry basil, or lavender honey!
Making Sorbet and Frozen Yogurt

Expand your frozen dessert repertoire! Sorbet bases, typically fruit puree and sugar syrup, churn similarly to ice cream. Frozen yogurt requires a yogurt base – Greek yogurt yields a tangier result. Adjust sugar levels based on fruit acidity or yogurt tartness.
Both sorbet and frozen yogurt may require a slightly shorter churning time than traditional ice cream to prevent an overly icy texture.
The Science Behind Ice Cream Making
Ice cream creation hinges on heat transfer and phase changes. The freezing bowl’s coolant absorbs heat from the ice cream base, utilizing latent heat of fusion to transition from solid to liquid.
Freezing point depression—adding sugar lowers the freezing temperature—prevents complete solidification, resulting in a smooth, scoopable texture. A functioning coolant is crucial for effective heat removal.
Role of the Freezing Bowl’s Coolant
The coolant within the Cuisinart bowl is paramount for freezing. Typically a 70% water, 30% propylene glycol mixture, it maintains a temperature below 0°C (32°F).
A properly frozen coolant absorbs heat from the ice cream base, initiating the freezing process. If the coolant fails—sloshing indicates this—it won’t reach a sufficiently low temperature, resulting in a liquid, unfreezen base.
Understanding Latent Heat and Freezing Point Depression
Latent heat is crucial; the coolant absorbs heat as it freezes, not just by being cold. Freezing point depression explains why adding salt to ice lowers its temperature.
The coolant mixture’s composition (70% water/30% propylene glycol) lowers its freezing point, enabling it to stay frozen while drawing heat from the ice cream base, effectively solidifying it. A failed coolant loses this ability.

Comparing Methods: Modern vs. Traditional
Traditional ice cream making, utilizing ice and rock salt, is finicky and labor-intensive, demanding constant attention to maintain the correct temperature and consistency.
Conversely, a Cuisinart machine offers convenience and consistent results. While evoking nostalgic memories, the older method pales in comparison to the modern machine’s ease of use and superior product quality, minimizing effort for delightful ice cream.
Ice and Rock Salt Method vs. Cuisinart Machine
The ice and rock salt method relies on lowering the freezing point of water to create a sufficiently cold environment for ice cream. This process is incredibly finicky, requiring precise ratios and constant monitoring.
A Cuisinart machine, however, simplifies this by utilizing a pre-frozen bowl with a built-in coolant, offering a consistent and controlled freezing process—eliminating the mess and guesswork of the traditional approach;
Advantages of Using a Cuisinart Ice Cream Maker
Cuisinart ice cream makers offer significant advantages over older methods. They provide convenience, consistency, and superior results with minimal effort. The pre-frozen bowl eliminates the need for messy ice and salt mixtures, streamlining the process.

Modern machines deliver reliably frozen treats, allowing for experimentation with flavors and mix-ins, creating a delightful experience without the finicky nature of traditional techniques.
Replacing the Coolant (Advanced Users)
If your bowl’s coolant fails – evidenced by continued sloshing when frozen – replacement is possible, though advanced. Carefully drill small holes to drain the existing liquid. Prepare a 70% water and 30% propylene glycol mixture, aiming for a -14°C (7°F) freezing point.

Refill the bowl, securely seal the holes, and test. Proceed with caution, as improper handling can damage the unit.
Identifying a Failed Coolant System
A compromised coolant system manifests as the inability to freeze the bowl sufficiently, resulting in a liquid ice cream base despite prolonged churning. The key indicator is a sloshing sound within the frozen bowl – a frozen coolant should be solid and immobile.
This suggests the coolant’s freezing point has risen, rendering it ineffective. Testing this is crucial before attempting other troubleshooting steps.
DIY Coolant Replacement Procedure (70% Water/30% Propylene Glycol)
Carefully drill small holes in the bowl’s plastic casing to drain the existing, degraded coolant. Prepare a 70% distilled water and 30% propylene glycol mixture – this yields a -14°C (7°F) freezing point. Thoroughly flush the bowl with the new solution, ensuring complete replacement.
Seal the drilled holes securely with a waterproof sealant to prevent leaks and maintain the bowl’s integrity.
Safety Precautions
Always unplug the machine before disassembling or cleaning. Exercise caution when handling the frozen bowl; avoid sudden impacts that could cause cracking or damage. Never immerse the motor unit in water or any other liquid.
Ensure electrical cords are undamaged and kept away from sharp edges. Handle propylene glycol with care during coolant replacement, following safety guidelines.
Electrical Safety Guidelines
Always verify the voltage of your outlet matches the machine’s requirements before operation. Never operate the Cuisinart ice cream maker with a damaged cord or plug; seek professional repair. Avoid using extension cords if possible, and if necessary, ensure it’s appropriately rated.
Keep the motor unit away from water sources to prevent electric shock. Unplug the machine when not in use and before cleaning.
Handling the Frozen Bowl with Care
Avoid dropping the frozen bowl, as impact can compromise the coolant system, rendering it ineffective. Do not attempt to thaw the bowl forcibly; allow it to warm up gradually at room temperature. Extreme temperature changes can cause cracking.
Inspect the bowl regularly for any signs of damage. If the coolant sloshes when warm, it indicates a potential issue and requires attention—avoid use until addressed.